
Introduction
In the fast-paced world of business, every detail counts, especially when it comes to getting paid for your hard work. An invoice is more than just a document; it’s a vital tool in your financial toolkit. It serves not only to request payments but also to establish professionalism and maintain clear communication with clients. Yet, creating an effective invoice doesn’t have to be a daunting task.
With Microsoft Word at your fingertips, crafting a polished invoice is easier than ever. Whether you’re a freelancer juggling multiple clients or a small business owner managing a growing client base, being able to produce clear, professional invoices can streamline your billing process and enhance your cash flow.
In this comprehensive guide, we will explore the importance of invoicing, highlight the benefits of using Microsoft Word for this task, and walk you through a step-by-step process for creating your own invoices. By the end, you’ll have the knowledge and tools to create invoices that not only look great but also ensure you get paid on time. Let’s dive into the world of efficient invoicing and unlock the secrets to managing your payments effectively.
The Importance of Invoicing
Establishing Professionalism
In the realm of business, first impressions matter. A well-crafted invoice not only serves as a request for payment but also communicates your brand’s professionalism. When clients receive a polished invoice, they are more likely to view your business as credible and trustworthy. This professionalism can set you apart from competitors, helping to foster long-lasting relationships with clients who appreciate your attention to detail.
Facilitating Payment
Clear and concise invoices are essential for ensuring timely payments. When clients can easily understand what they owe and the payment terms, they are less likely to delay processing your payment. A well-structured invoice includes specific details such as due dates, itemized services, and payment methods, making it straightforward for clients to comply. By minimizing confusion, you create a smoother transaction experience that benefits both you and your clients.
Record Keeping
Invoices are vital documents for record keeping and accounting practices. They serve as official proof of transactions, providing a clear paper trail for both you and your clients. This is particularly important during tax season or in case of financial audits. Keeping organized records of your invoices not only aids in tracking income but also helps you understand your business’s financial health over time. Proper documentation can save you from potential headaches in the future.
Legal Protection
In the event of payment disputes, invoices can provide important legal protection. They serve as formal agreements that outline the terms of the sale, including what services were rendered and when payment is due. This documentation can be invaluable if disagreements arise or if a client fails to pay. By having a consistent invoicing process, you safeguard your business interests and establish a clear framework for resolving potential conflicts.
Benefits of Using Microsoft Word for Invoicing
When it comes to crafting invoices, Microsoft Word stands out as a user-friendly option that can simplify the invoicing process. One of the key advantages is the software’s accessibility—most people are already familiar with its interface. This means you won’t have to spend hours learning how to navigate a new program. Instead, you can focus on what really matters: getting your invoices out quickly and accurately.
Here are some specific benefits of using Microsoft Word for invoicing:
- Easy Customization: Microsoft Word offers a range of templates that you can easily modify to fit your brand’s aesthetic. From changing colors to adding your logo, personalizing your invoices has never been simpler.
- Professional Appearance: Well-designed invoices enhance your business’s credibility. With Word’s extensive formatting options, you can create invoices that not only look professional but also reflect your brand’s identity.
- Versatile Export Options: After you’ve created your invoice, Word allows you to save or export it in various formats, including PDF. This ensures your formatting remains intact, regardless of the device your client uses to view it.
In a world where first impressions matter, using Microsoft Word for invoicing can help you present a polished image to your clients. With its combination of ease of use and powerful customization features, you can create invoices that not only serve their purpose but also showcase the professionalism of your business.
Step-by-Step Guide to Creating an Invoice in Microsoft Word
Creating an invoice in Microsoft Word is a straightforward process that can save you time and improve your professionalism. Here’s how to get started with a step-by-step guide that walks you through each stage of the invoicing process, ensuring you don’t miss any crucial details.
Step 1: Accessing Invoice Templates
First, you’ll want to tap into the power of Microsoft Word’s built-in invoice templates. To do this, open Microsoft Word and navigate to the “File” tab at the top left of your screen. From the dropdown menu, click on “New.” In the search bar, type “invoice” and hit enter. You’ll see a variety of templates pop up, each offering a unique design and layout to suit different business needs.
Step 2: Choosing a Template
After you’ve searched for invoice templates, take a moment to browse through the options available. Click on any template that catches your eye to preview its design. Look for one that aligns with your brand and includes all the necessary fields for your billing needs. Once you find the perfect template, select it and press the “Create” button to open it in a new document.
Step 3: Customizing the Invoice
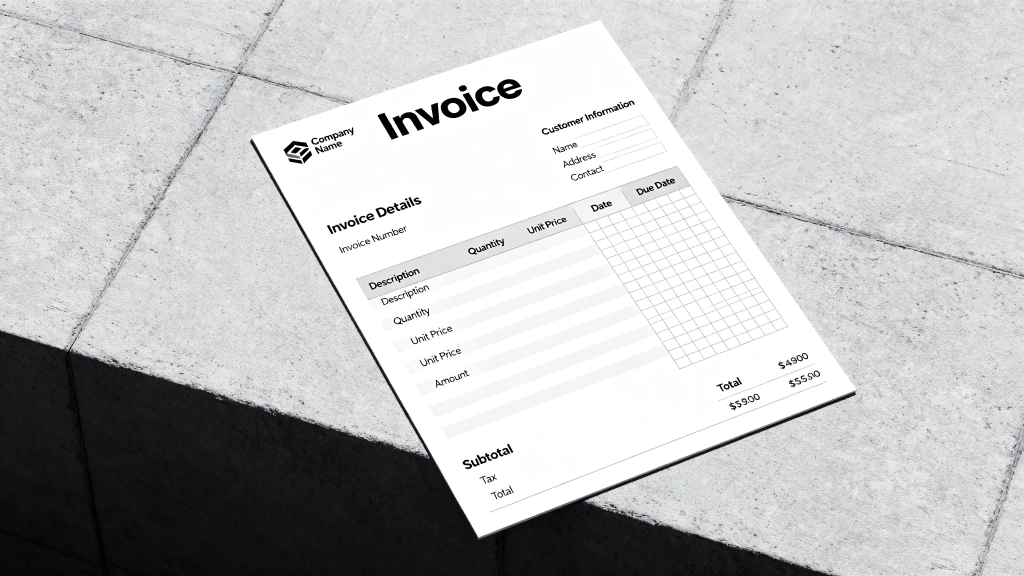
Now comes the fun part—customizing the invoice to make it uniquely yours. Start by entering your business information at the top, including your name, address, phone number, and email. Don’t forget to add your company logo for that extra touch of professionalism! Next, provide the client’s information, followed by the invoice details such as the invoice number, date of issue, and due date. It’s essential to include a detailed itemized list of the services or products provided, complete with descriptions, quantities, unit prices, and total amounts. Lastly, clearly outline your payment terms, specifying accepted payment methods and any late fees to avoid misunderstandings down the road.
Step 4: Finalizing the Invoice
With your invoice customized, it’s time to finalize it. Review all the information carefully to ensure accuracy—double-check calculations and correct any typos. Once you’re satisfied, consider exporting the document as a PDF to maintain formatting when sending it to clients. To do this, click on “File,” select “Export,” and choose “Create PDF.” This step will ensure your invoice looks professional and polished when it lands in your client’s inbox. With your PDF invoice ready, you can send it off via email or your preferred method, reassuring your clients of your professionalism and encouraging timely payments.
By following these steps, you’ll be well on your way to creating invoices that not only look great but also facilitate smooth transactions for your business. Happy invoicing!
Accessing Invoice Templates
When it comes to creating an invoice in Microsoft Word, the first step is to access the available templates. This is an easy and efficient way to get started on your invoicing journey. To begin, open Microsoft Word on your computer and navigate to the “File” tab located in the top left corner of the window. From there, select “New” to explore the various template options available to you.
In the new document section, you’ll find a search bar. This search bar is your gateway to a plethora of invoice templates. Simply type “invoice” and hit enter. Almost instantly, you’ll be greeted by an array of templates designed to cater to different industries and aesthetic preferences. Take your time to browse through these options, as the right template can set the tone for your business’s professionalism.
Once you’ve found a few templates that catch your eye, it’s time for a closer look. Previewing templates is crucial to ensure that the layout and design align with your business’s branding. Click on any template to see a larger view, allowing you to assess the overall design, structure, and functionality. Look for elements that resonate with your style, and don’t hesitate to consider how easily you can customize the template to meet your specific needs.
After you’ve thoroughly explored the available options, it’s time to make a choice. Selecting a template that fits your brand and meets your invoicing requirements is a key step in creating a polished invoice. Once you’ve identified your preferred template, simply click on it and press the “Create” button. This action will open the template in a new document, ready for you to customize and fill in with your business information. With this foundational step complete, you’re one step closer to producing an invoice that not only looks great but also serves its intended purpose efficiently.
Choosing a Template
Explore Your Options
After accessing the available invoice templates in Microsoft Word, you may find yourself faced with a plethora of choices. This is where the fun begins! Take a moment to browse through the different designs and layouts that capture your eye. Each template has its unique features, so don’t hesitate to click on them for a quick preview. Visualizing how your information will appear on the invoice can make the selection process much easier.
Align With Your Brand
When choosing an invoice template, consider your brand identity. Your invoice is a reflection of your business, so it should convey the right message to your clients. Look for a template that incorporates your color scheme, fonts, and overall aesthetic. A cohesive look can enhance brand recognition and leave a lasting impression on your clients. Whether you prefer a modern, sleek design or a more traditional layout, ensure that it aligns with your brand style.
Keep Functionality in Mind
While aesthetics are important, functionality should be at the forefront of your decision-making process. Choose a template that allows you to easily input necessary information such as item descriptions, quantities, and pricing. A well-structured template will facilitate a smoother billing process and minimize the risk of errors. Look for features like clear sections for client details, payment terms, and a summary of charges that enhance usability.
Consider Your Needs
Think about your specific invoicing requirements. Do you typically bill clients for hourly services, or do you sell physical products? Depending on your offerings, you may require a template that accommodates different types of entries. Some templates are designed for service-based businesses, while others cater to product-based companies. Tailoring your choice to your business model can simplify the invoicing process and make it more efficient.
Make the Final Choice
Once you’ve explored your options, aligned a template with your brand, considered functionality, and assessed your needs, it’s time to make your final choice. Select the template that resonates with you and feels right for your business. After clicking the “Create” button, you’ll have a blank slate ready for customization. This is your chance to create an invoice that not only serves its purpose but also showcases the professionalism and quality of your business.
Customizing the Invoice
After you’ve selected a template that resonates with your business style, it’s time to roll up your sleeves and customize the invoice to suit your specific needs. Personalization is key here; it ensures that your invoice stands out and reflects your brand effectively. Start by entering your business information. This includes your business name, address, phone number, and email. Make sure this information is prominently displayed at the top of the invoice, as it allows your clients to easily reach you if they have questions.
Next, consider adding your company logo. A logo isn’t just a graphic; it’s a visual representation of your brand. To insert your logo, click on the placeholder image in the template and upload your logo file. This small touch not only enhances brand recognition but also adds a professional flair to your invoices. Remember, your invoice is often the first impression clients have of your business, so make it count!
The invoice also needs to include pertinent client information. Enter the client’s name and address in the designated area to ensure the invoice is personalized and directed to the correct recipient. This step is crucial for establishing a professional relationship and ensuring that your invoice doesn’t end up in the wrong hands. Additionally, be sure to fill in essential details like the invoice number, date of issue, and payment due date. These elements play a vital role in tracking payments and maintaining accurate records.
Lastly, it’s time to itemize the services or products being billed. Create a detailed list that includes:
- Descriptions: Clearly explain what services or products were provided.
- Quantities: Specify the number of items or hours of service rendered.
- Unit Prices: List the cost for each item or service.
- Total Amounts: Calculate the total cost for each line item.
This transparency not only helps clients understand what they are being charged for but also fosters trust in your business dealings. By customizing your invoice thoroughly, you’ll create a document that is not only functional but also a true reflection of your brand identity.
Finalizing the Invoice
Once you’ve taken the time to customize your invoice, it’s crucial to ensure everything is accurate and polished before sending it out. This step may seem minor, but it can make a significant difference in how your business is perceived. Start by reviewing the content meticulously. Double-check the calculations, ensuring your itemized list adds up correctly. Any discrepancies can lead to confusion and may delay your payment.
Next, pay attention to the formatting. A clean and professional layout not only looks better but also makes it easier for clients to navigate through the information. Ensure your branding is consistent throughout the document—this includes your company logo, colors, and font choices. A well-organized invoice reflects your attention to detail and professionalism, reinforcing trust with your client.
After you’ve confirmed that the details are correct and the layout is polished, it’s time to export your invoice. Converting your Word document into a PDF is often the best option. PDF files preserve the original formatting, ensuring your clients see the invoice exactly as you intended, regardless of the device they’re using. To do this, simply navigate to the “File” menu, select “Export,” and then choose “Create PDF.” Follow the prompts, and your invoice will be ready for distribution.
Before sending the invoice, take a moment to draft a polite email or message. This communication is just as essential as the invoice itself. In your message, thank your client for their business, remind them of the payment terms, and encourage them to reach out if they have any questions. A positive tone can go a long way in fostering strong client relationships and ensuring timely payments.
Finally, keep a record of all invoices you send out. This is not only good practice for bookkeeping but also invaluable for tracking payments and following up if necessary. Maintaining these records can save you time and reduce stress during tax season. By finalizing your invoice with care and professionalism, you set the stage for a smooth transaction and a happy client relationship.
Sending the Invoice
Once you’ve meticulously crafted your invoice and converted it into a PDF, it’s time to deliver it to your client. A well-timed and structured delivery can set the tone for a smooth transaction. Consider how you want to send it—email is often the quickest and most efficient option. When composing your email, keep it professional yet friendly. Start with a courteous greeting that acknowledges the client’s business. A simple, “I hope this message finds you well” can go a long way in building rapport.
Next, attach the PDF invoice, ensuring the file name is clear and professional, such as “Invoice_12345_YourBusinessName.pdf.” In the body of your email, briefly explain what the invoice entails. Mention the due date and payment terms, but try to keep this section concise. Clients appreciate clarity, so highlight any key details without overwhelming them with information. A well-organized email makes it easier for clients to locate important points quickly.
Don’t forget to express gratitude for their business! A little appreciation can enhance your relationship and encourage prompt payment. You might say something like, “Thank you for your continued support; I look forward to working with you again!” This personal touch not only fosters goodwill but may also prompt clients to prioritize your invoice amidst their other financial commitments.
Finally, consider setting a reminder for yourself to follow up. If payment hasn’t been received by the due date, a polite email reminder can make all the difference. It’s easy for invoices to slip through the cracks, so a gentle nudge can help ensure you get paid on time. With these steps, you’re well on your way to a seamless invoicing process that keeps your cash flow healthy and your business thriving.
Best Practices for Effective Invoicing
To ensure your invoicing process runs smoothly, consistency is key. Establish a standard format for all your invoices, including fonts, colors, and layout. This not only helps in creating a professional image but also makes it easier for clients to recognize your invoices quickly. When they see a familiar format, they are more likely to pay promptly. Incorporate your branding elements, such as your logo and company colors, to reinforce your brand identity. Consistent branding builds trust and reinforces your professionalism.
Timeliness is another critical factor that can influence your cash flow. Aim to send invoices as soon as a project is completed or goods are delivered. Delaying invoice submissions can lead to delayed payments, which can negatively affect your finances. Consider setting a schedule for invoicing to help you stay organized. Whether you choose to send invoices weekly, bi-weekly, or monthly, keeping a consistent schedule ensures you remain top-of-mind for your clients when it comes to payments.
Following up on unpaid invoices is an essential part of maintaining cash flow. If a payment is late, don’t hesitate to reach out with a polite reminder. A friendly follow-up can often prompt a quick response and payment. Use a gentle tone, expressing your understanding that things can get busy. This approach not only helps you get paid but also shows your clients that you value your relationship with them. Remember, effective communication can strengthen your client connections and enhance your reputation.
Lastly, keep thorough records of all invoices sent and received. This documentation is crucial for your accounting and tax purposes. Digital records can be easily organized, allowing you to access information quickly when needed. Consider using accounting software or cloud storage solutions to keep everything in one place. Additionally, asking for client feedback on the invoicing process can provide valuable insights. Constructive feedback can help you identify areas for improvement, making your invoicing process even more efficient in the future.
Conclusion
Creating an invoice in Microsoft Word doesn’t have to be a chore. By understanding the importance of invoicing and utilizing the benefits of Word, you’re equipped to streamline your billing process efficiently. Throughout this guide, we explored how a well-crafted invoice can reflect your professionalism and enhance communication with your clients.
From accessing templates to customizing them to fit your unique needs, the steps outlined here are designed to empower you. Remember, a clear and organized invoice not only helps you get paid faster but also sets the tone for your client relationships.
By implementing the best practices discussed, you can ensure that your invoices are not just documents but effective tools for maintaining your financial health. So, take the plunge and start creating invoices that stand out—your business deserves to be paid on time, every time. Happy invoicing!
FAQ
1. Why is invoicing important for businesses?
Invoicing is crucial because it formalizes the request for payment, ensuring clarity in financial transactions. It also helps maintain professionalism and good communication with clients, ultimately leading to better cash flow and timely payments.
2. What are the benefits of using Microsoft Word for creating invoices?
Microsoft Word offers user-friendly features and a range of customizable templates, making it easy to create professional invoices. Its accessibility allows anyone, regardless of technical skill, to design and edit invoices that reflect their brand.
3. How can I access invoice templates in Microsoft Word?
You can access invoice templates directly within Microsoft Word by navigating to the “File” menu, selecting “New,” and then searching for “Invoice” in the template search bar. This will provide you with a variety of options to choose from.
4. What steps should I follow to customize my invoice?
To customize your invoice, start by selecting an appropriate template, then modify fields such as your business information, client details, item descriptions, quantities, and prices. Don’t forget to add your branding elements like logos and colors for a professional touch.
5. How do I finalize and send my invoice?
After customizing your invoice, review it for accuracy. Save it in a preferred format (like PDF), and then send it to your client through email or any other method of communication you usually use. Ensure to include a polite message and a reminder of the payment terms.
6. What are some best practices for effective invoicing?
To enhance your invoicing process, always include clear payment terms, maintain consistent branding, follow up on overdue invoices, and keep records of all invoices sent. This will help ensure you get paid on time and maintain healthy client relationships.
7. Can I create invoices for different types of services and products?
Absolutely! Microsoft Word’s flexibility allows you to create invoices for various services and products. You can easily adjust the invoice layout and details to suit the needs of different clients and transactions.
By following this guide, you can confidently create informative and visually appealing invoices that reinforce your professionalism and assist in getting payments on time.